Building The Dome
The original plan was to just pay a concrete contractor to build us a slab and then I'd
take over from there. Then I read some horror stories online about concrete guys—
who normally deal only with rectangles—
screwing up people's 15- or 20-sided dome foundations,
and decided maybe it should be an owner-built concrete form as well.
Spring is a busy season for excavators. By the time we got our site leveled,
a perimeter trench dug, and the under-slab plumbing in place
(all jobs we contracted out), it was the end of June, 2005.
Fortunately I had been using this time to pre-fab dome panels and struts.
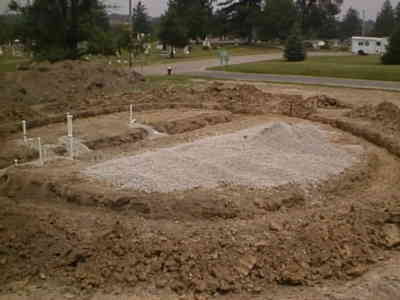
This shows the first of several truckloads of 1" clean gravel that Marcia and I
spread out and compacted:
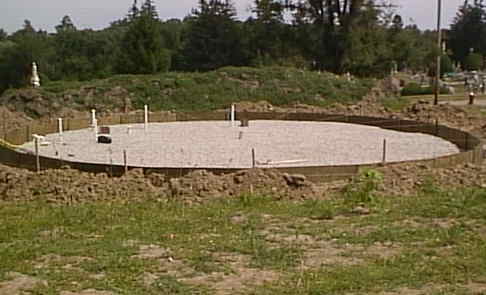
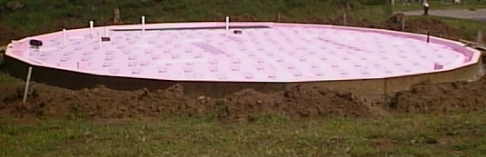
I built the concrete form from the outside in, starting with a 20-sided perimeter
of pressure-treated plywood:
There's 7-l/2" of extruded polystyrene foam inside the plywood perimeter, and 4" of the high-density type under the footing. Once the concrete is poured, the treated plywood serves to protect the foam from sun and insects:
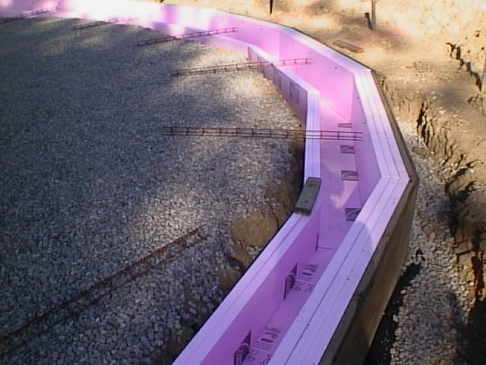
Notice how the thickened perimeter trench is still not very deep. We're building a frost protected shallow foundation. This kind of foundation is fairly new to the US, but they have been used successfully for many years in Canada and the Scandinavian countries. Instead of placing deep footers below the natural frostline, you use insulation to raise the frostline near the building.
There's 4-3/4" of high-density foam under the middle expanse of the slab:
A layer of 6 mil polyethylene is topped by rebar 18" on center. That's a lot of rebar, but I don't entirely trust this Iowa clay soil. A local builder told me that with that much rebar, we could park concrete trucks on our slab.
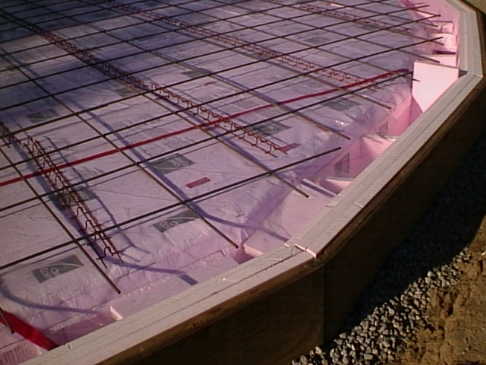
Most people skip the polyethylene if there's already foam under the concrete, but
we're in an area with potentially high radon levels, and the poly helps keep
the radon out of the living space.
The idea is that if any
radon seeps up under the slab, it will travel through the 4" thick layer of clean 1"
gravel and leave through the 4" PVC radon pipe. This pipe starts as a slotted T-shape
in the gravel layer, and runs vertically up through the foam, through the poly,
through the concrete, through a wall in the house, then through the roof to
vent to the outside air. If you still have worrisome radon levels, you can install a fan
in the pipe. Like a plumbing vent, the radon pipe needs to be
at least ten feet away from any openable window or skylight.
We conducted the week-long radon test with the doors and windows closed and the ventilator turned off. The results were well below the 4 pCi/L level, which is what you want. With normal ventilation it would be even lower.

I put 500' of PEX tubing in the slab for radiant floor heat. The conventional wisdom would say that's not enough PEX, but I figured the greatly elevated insulation levels changed the rules. As it turns out, I was right.
My idea at the time was that whenever the sun was shining and the house needed heat, antifreeze would pump from the slab to a solar heat collector and then carry that heat back into the slab. This direct loop probably would have worked to some degree, but I found reasons it wasn't the best plan:
- A collector tied directly to the slab couldn't be used to solar-heat domestic hot water the rest of the year, and its antifreeze could be damaged by high temperatures in the summer.
- Apparently one foot of half-inch PEX can only release about 25 BTU/hour. So 500' of PEX times 25 is 12,500 BTU/hour, times 4 hours of peak winter sun is only 50,000 BTUs per day. Our worst month's heat needs, I estimate, average about 160,000 BTUs per day.
- 160,000 BTUs doled out over 13 hours (at 12,500 BTU/hour) would work fine. Unfortunately, I neglected to include space inside the dome for a 300 gallon water tank to store all those BTUs. The place to put it would have been right next to the water heater so it could also pre-heat the domestic hot water. Ideally, both of them would have been against a south wall holding a large drainback collector, thus avoiding the use of antifreeze.
If I had put a lot more PEX in the slab, it would have been possible to transfer a whole day's worth of heat during the brief hours of winter sunlight. But that could have resulted in a big late afternoon temperature spike. Without sophisticated controls, even radiant slabs heated by conventional boilers are known to overshoot their mark. When your slab can only release 12,500 BTU/hr, though, a simple air-temperature thermostat can stop it before you're roasted.
Some people in green building circles believe that radiant floors aren't a great fit for superinsulated houses. For one thing, radiant's big selling point is the emotional appeal of warm floors, but in an extremely well insulated house the floors only need to be a couple degrees above the target indoor air temperature, so they don't feel particularly warm.
Commenters at Green Building Advisor often make the point that there's no reason to bother with the expense of a radiant slab because a superior solution exists: just heat your superinsulated house with a ductless mini-split heat pump, which also provides cooling in summer. It's a compelling argument. The Mitsubishi MSZ-FH09NA, their smallest, highest-SEER model, works down to -13°F and would be able to heat our whole dome (as long as the various rooms' doors were kept open most of the time, which is not a requirement with the radiant floors). It would be too small for our cooling needs, though, so if I got a mini-split I'd actually get the largest one in that series, the MSZ-FH15NA.
A mini-split gets about three times more heat out of a kilowatt-hour compared to electric resistance heating, so with a mini-split but no solar we'd be spending about $120/year rather than $360/year on space heat. That's great from the standpoint of reducing our carbon footprint, but financially it seemed very possible that the $240/year savings would be mostly consumed by maintaining, and eventually replacing, the mini-split.
Plus, a mini-split would have done nothing for our other big energy expense, domestic hot water. So I ultimately rejected the mini-split idea and decided to build a large solar heat collector after all. I put the 300 gallon tank outside, and insulated it really well. A mini-split may have triple the performance of electric resistance heat, but getting tens of thousands of BTUs from the sun for the cost of running a couple pumps is better still.
Having only 500' of PEX in the slab hasn't been a problem. There are warm spots, but they're delightful.
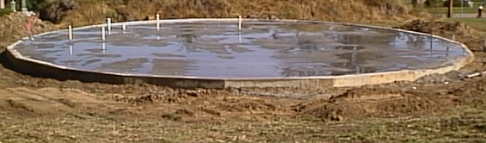
The slab was poured September 15th, 2005. We used a stronger concrete mix than the usual.
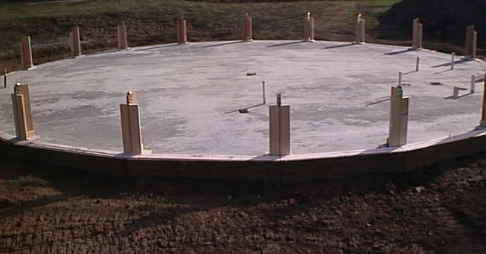
When the riser wall corners were bolted in place, it reminded me of Stonehenge:
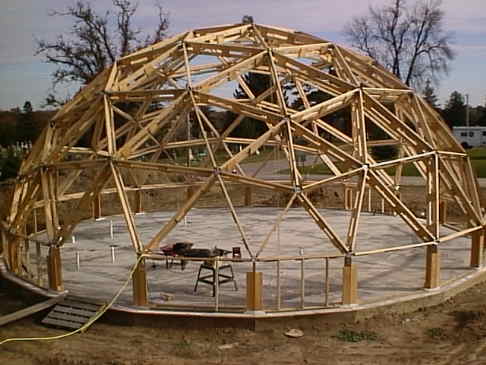
Struts going up:
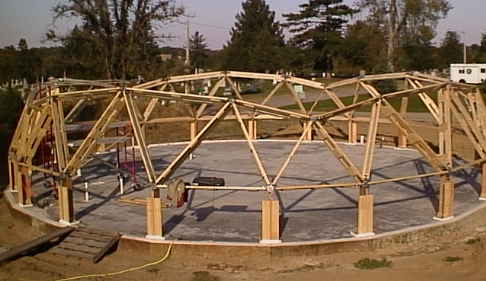
The trick to putting up a Natural Spaces dome when you're the only
person up on the scaffold is to keep a couple Phillips screwdrivers
within reach at all times. You lift the strut up next to its hub just
long enough to slip the screwdriver into the slot where eventually
the 4-1/2" pin will go. The screwdriver is thin enough to go in easily,
but strong enough to hold the strut in place while still allowing some
adjustability while you complete a triangle.
If it's a horizontal strut, hold one end in place with a screwdriver
then use a three or four foot 2x4 as a lever to persuade the sleeve at the
other end of the strut past the curve of its hub. When both ends of
the strut are where you want them, remove the screwdriver and pound in the pins.
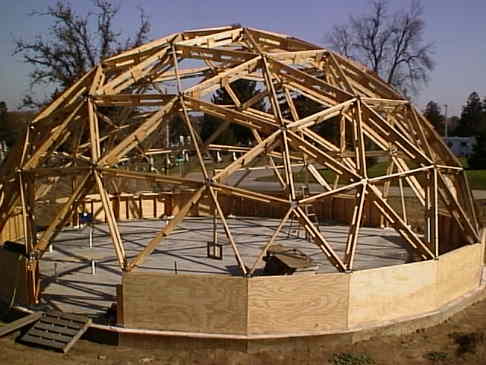
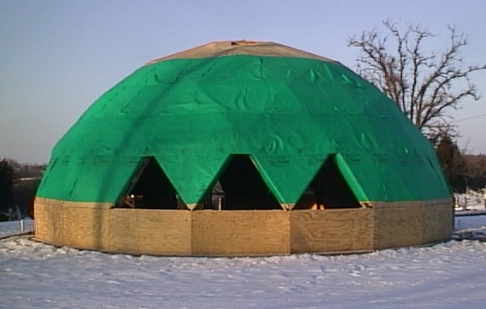
Then the sheathing:
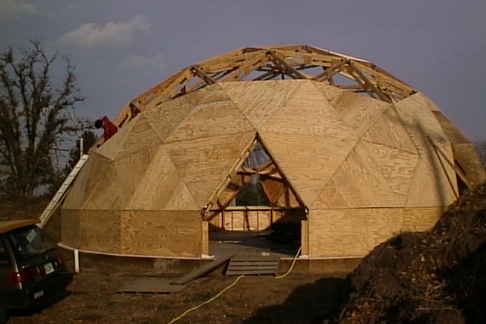

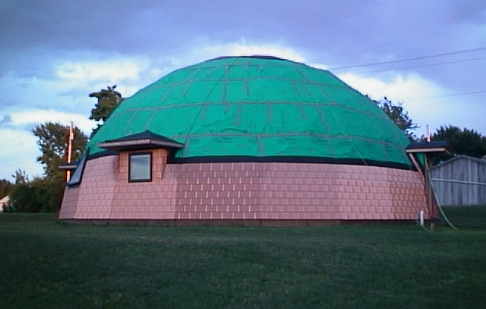
Next came a layer of Vaproshield breathable roofing underlayment.
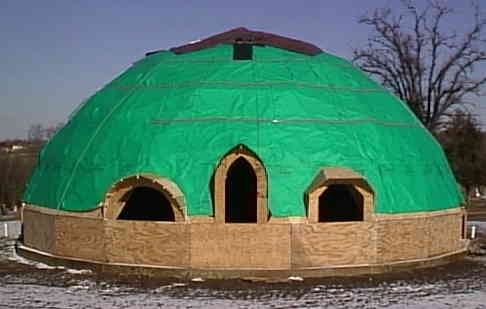
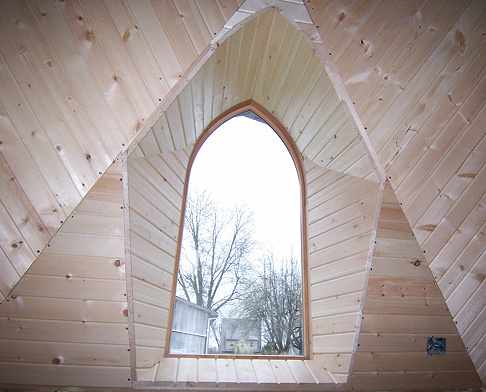
We got a deal on some fun, unusually-shaped windows, but it took me months and months— literally all winter and most of the spring— to build seven custom dormers. I'm glad there's some overhang on these south-facing windows, though. Too much unshaded south glass can cause overheating in the summertime.
The big triangular skylight from Natural Spaces was expensive, but it only took two hours to install. If your time has any monetary value, it would probably make sense to have more triangle skylights and fewer windows requiring dormers.
On the other hand, besides the summer heat issue, skylights can be obscured for weeks following an ice storm, while vertical windows under overhangs remain clear.

I put 6" of foam around the base of the riser wall to keep cold air away from the concrete slab.
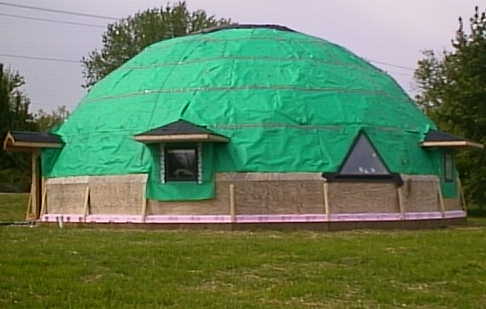
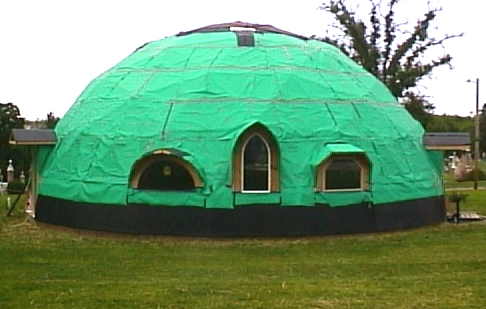
The foam was followed by plywood, the angle of which makes the riser wall look like a continuation of the curve of the dome.

The plywood got a layer of ice-and-water shield to resist leaks in case of melty snow drifts. This was late May, 2006.
Shingling the roof took all summer. One thing about the Reinke shakes is that you can't use a nail gun because it would dent the metal. I had to drive all 16,000 nails the old-fashioned way. But it's not really the hammering that takes the time, it's hanging sections of 18" wide 15# roofing felt between each row.
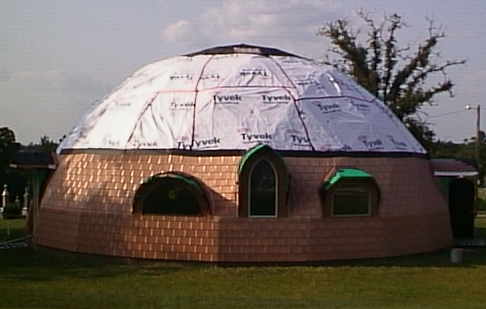
Near the top, where the slope of the roof gets shallower, I put a layer of Tyvek over the Vaproshield. I also backed each section of felt with Tyvek for extra protection.
Roofing the main dome surface was completed September 20th, 2006.

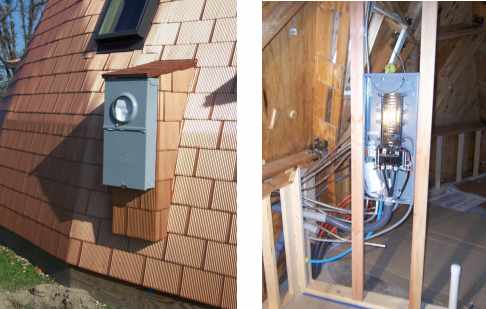
Once the roof was weatherproof, my priority became getting the interior finished enough that the foam crew could insulate. This involved inner framing for the doors, windows, and riser walls, then running electrical conduit for lights and outlets. I also had to build a little bump-out for the electric meter and a section of wall for the breaker box.
The design called for 10" of spray-foam in a 12" cavity, but in some places it filled the whole 12" and had to be trimmed. The top of the dome is all closed cell foam. As the walls get closer to vertical, there's a mix of open cell and closed cell, so we have the dome equivalent of R‑60 roof, R‑40 walls.

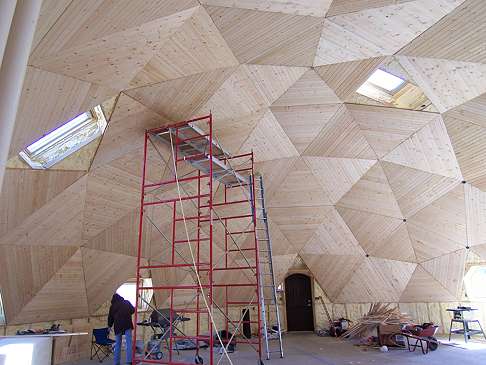
The triangular spruce panels went up fairly quickly, but fitting the spruce around the windows took a long time—almost every piece of wood had a compound angle on both ends.
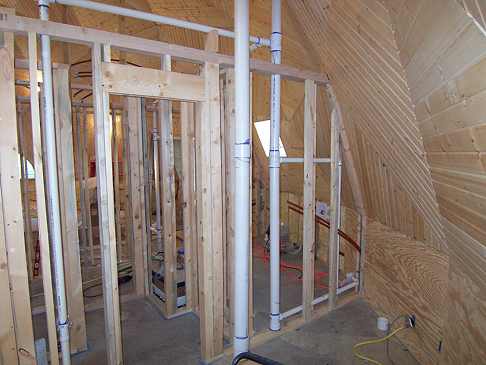
Next I started framing the internal rooms.
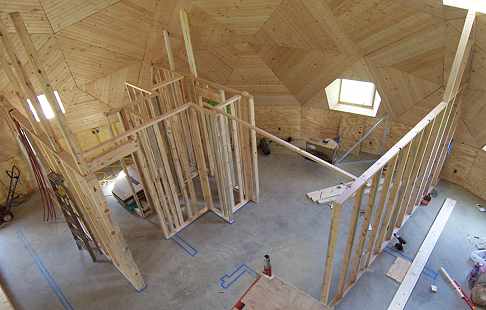
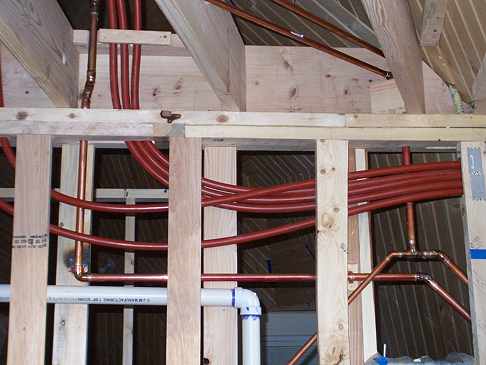
The walls hold plumbing and ductwork.
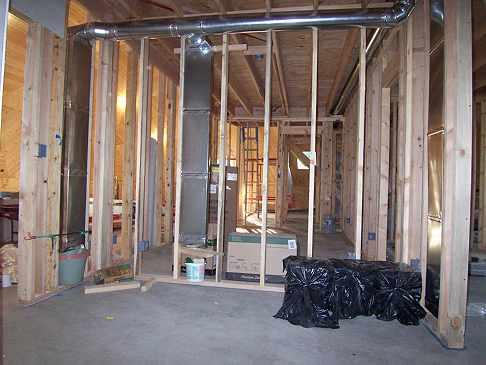
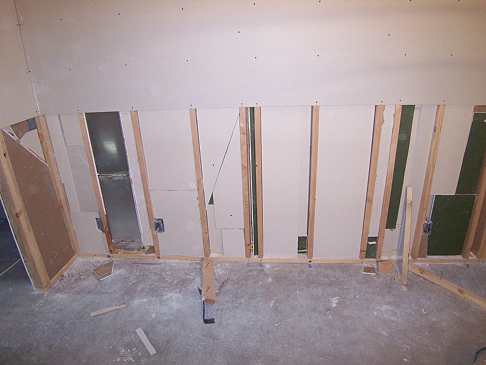
What to do with leftover scrap drywall? Instead of hauling it to the landfill and paying them to take it, I put it between the studs in the wall shared by the bedroom and studios. There it will add thermal mass and reduce noise transmission.
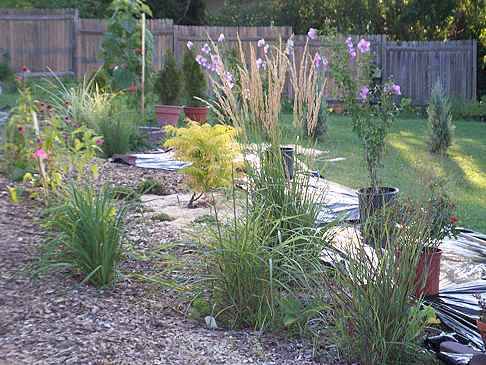
Meanwhile, Marcia's garden area was taking shape.